Claude Mobile App
The Claude Mobile app (iOS / Android) supports MCP connectors — however, custom connectors can currently only be added through the web interface at claude.ai. Once set up, the connector syncs automatically to the mobile app.
Setup consists of two parts:
- Set up the connector via claude.ai (in your mobile browser)
- Use it in the Claude Mobile app
Prerequisites
- Claude Pro or Max subscription (connectors are part of these plans)
- A PortDive account
- Access to claude.ai in a mobile browser (Chrome, Safari, etc.)
Part 1: Set up the connector via claude.ai
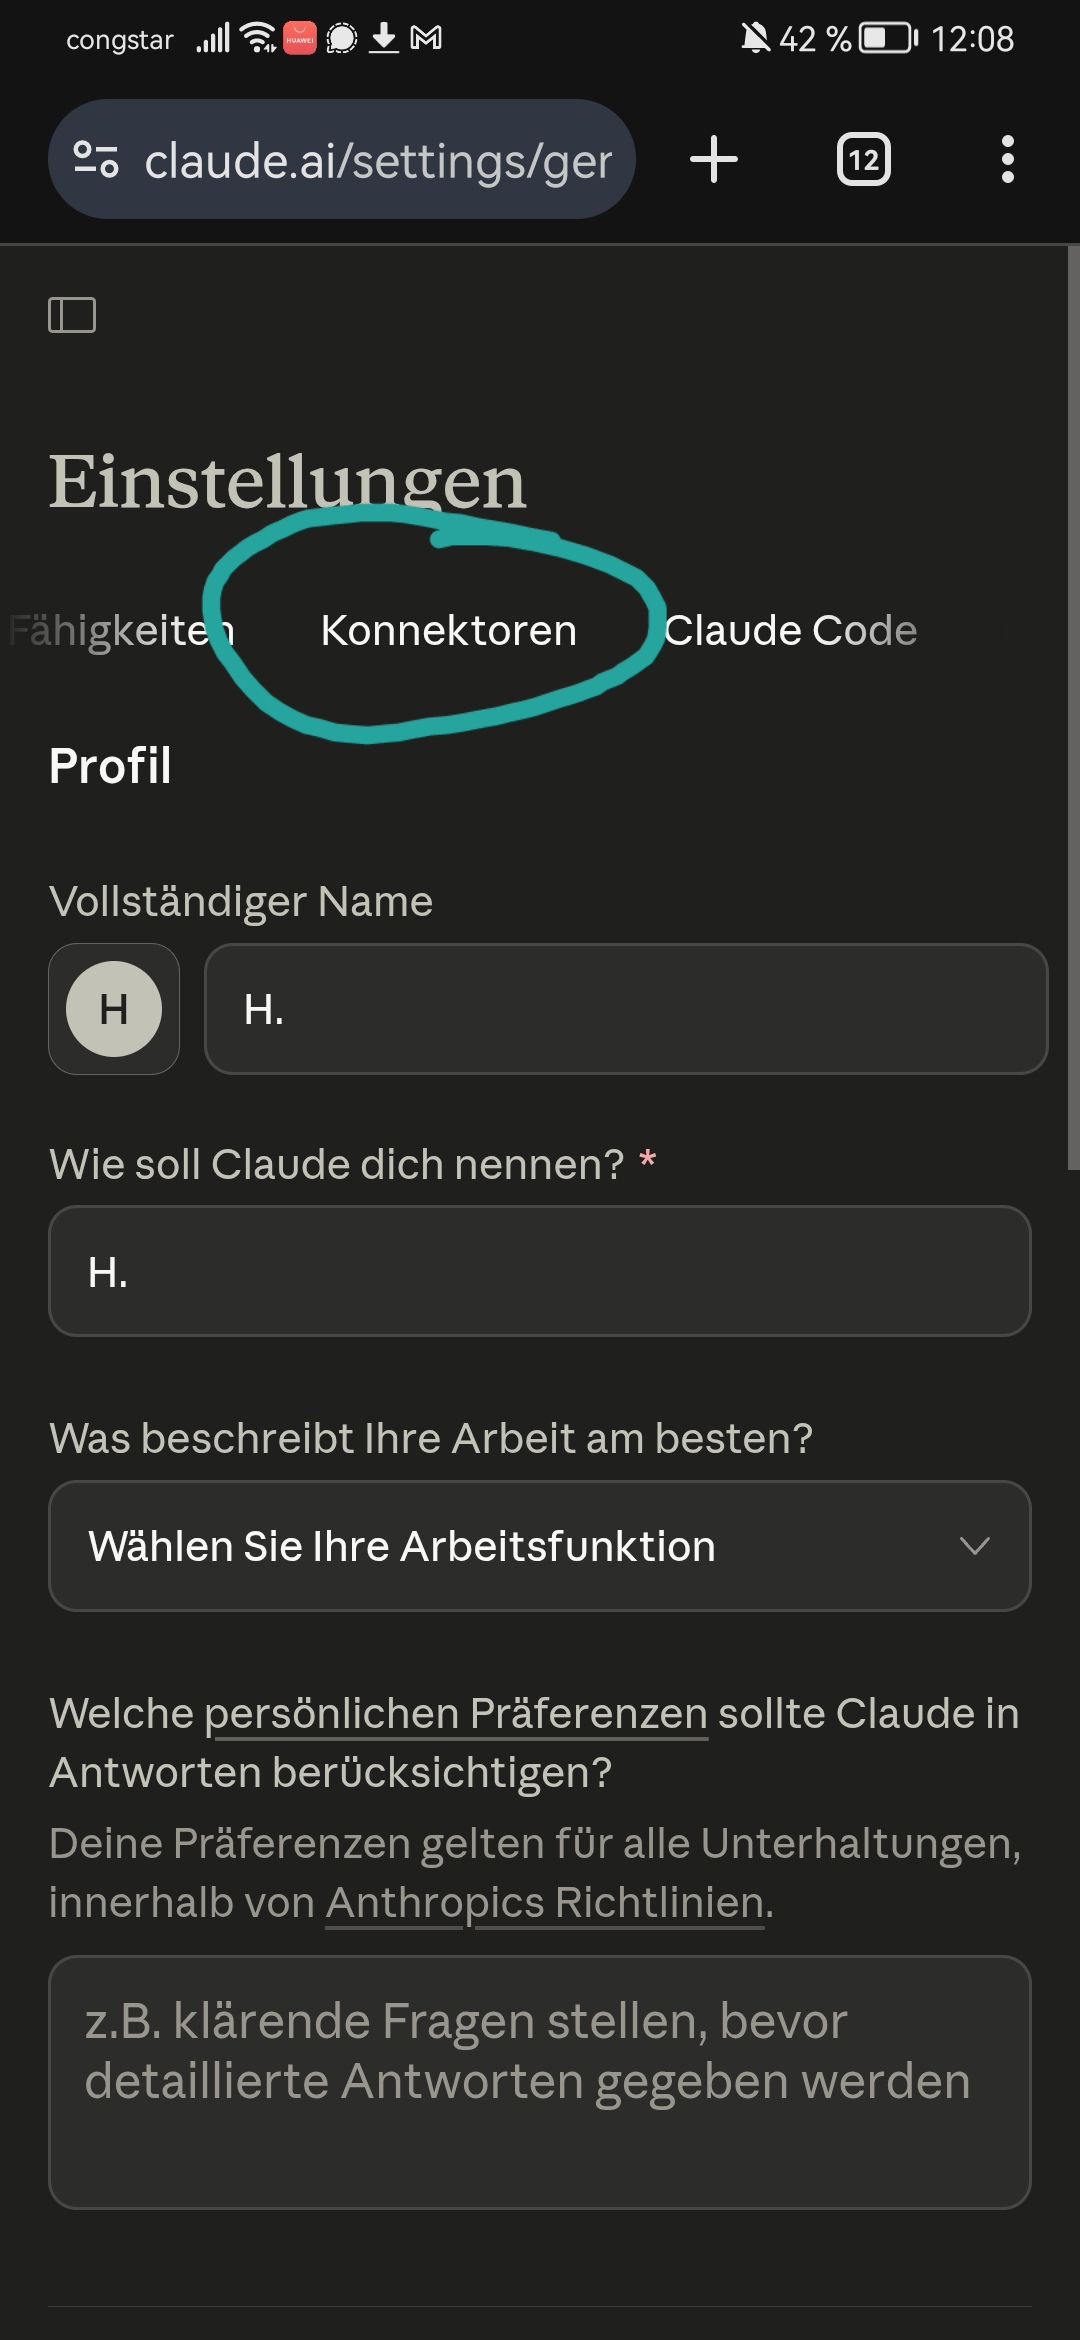
1. Open Settings
Open claude.ai/settings in your mobile browser and tap the Connectors tab:
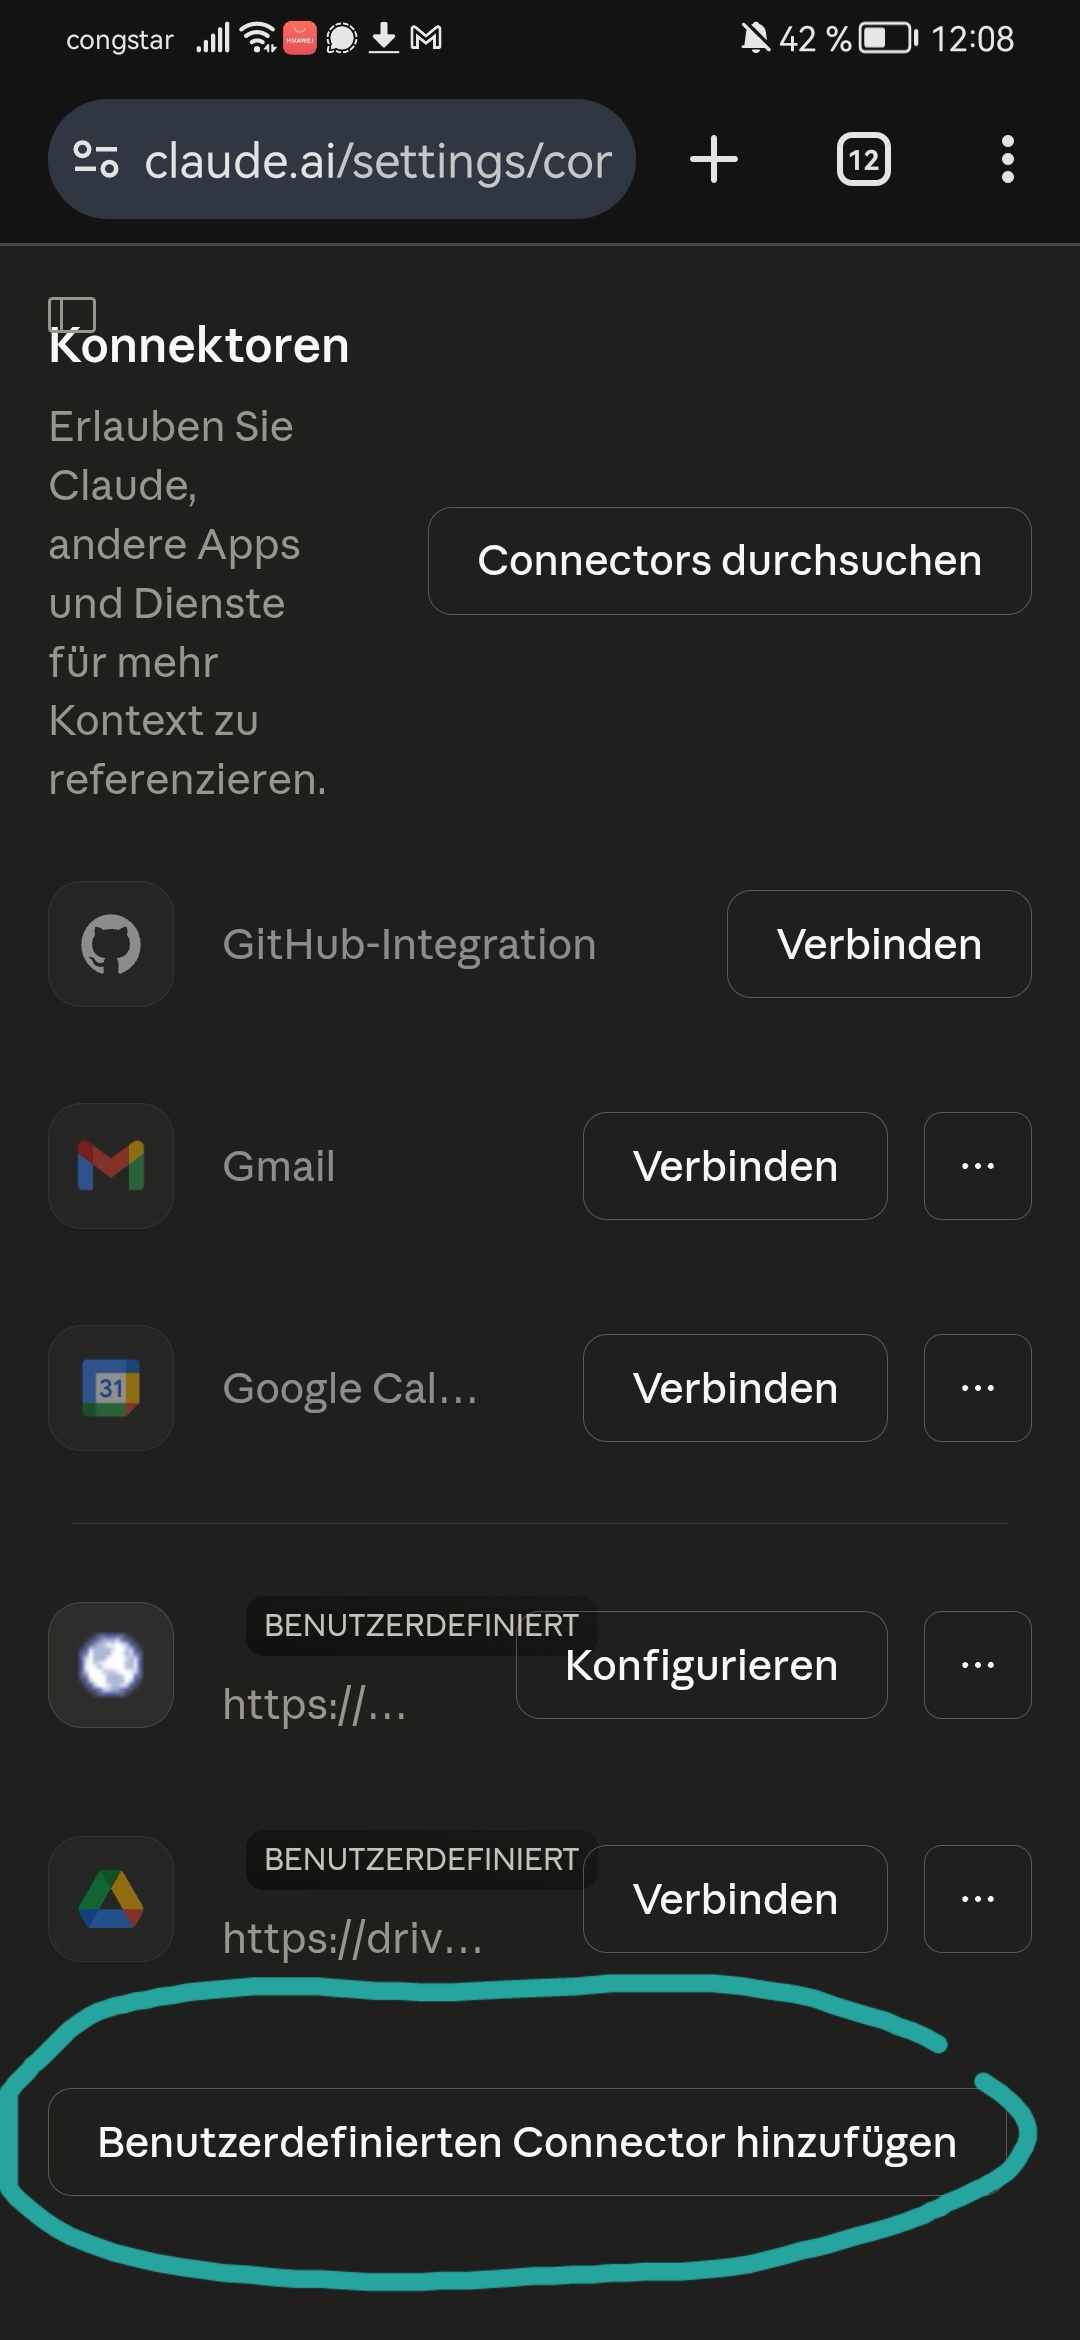
2. Add custom connector
Scroll down and tap Add custom connector:
3. Enter name and URL
Fill in the following:
- Name:
portdive - URL:
https://mcp.portdive.app/mcp
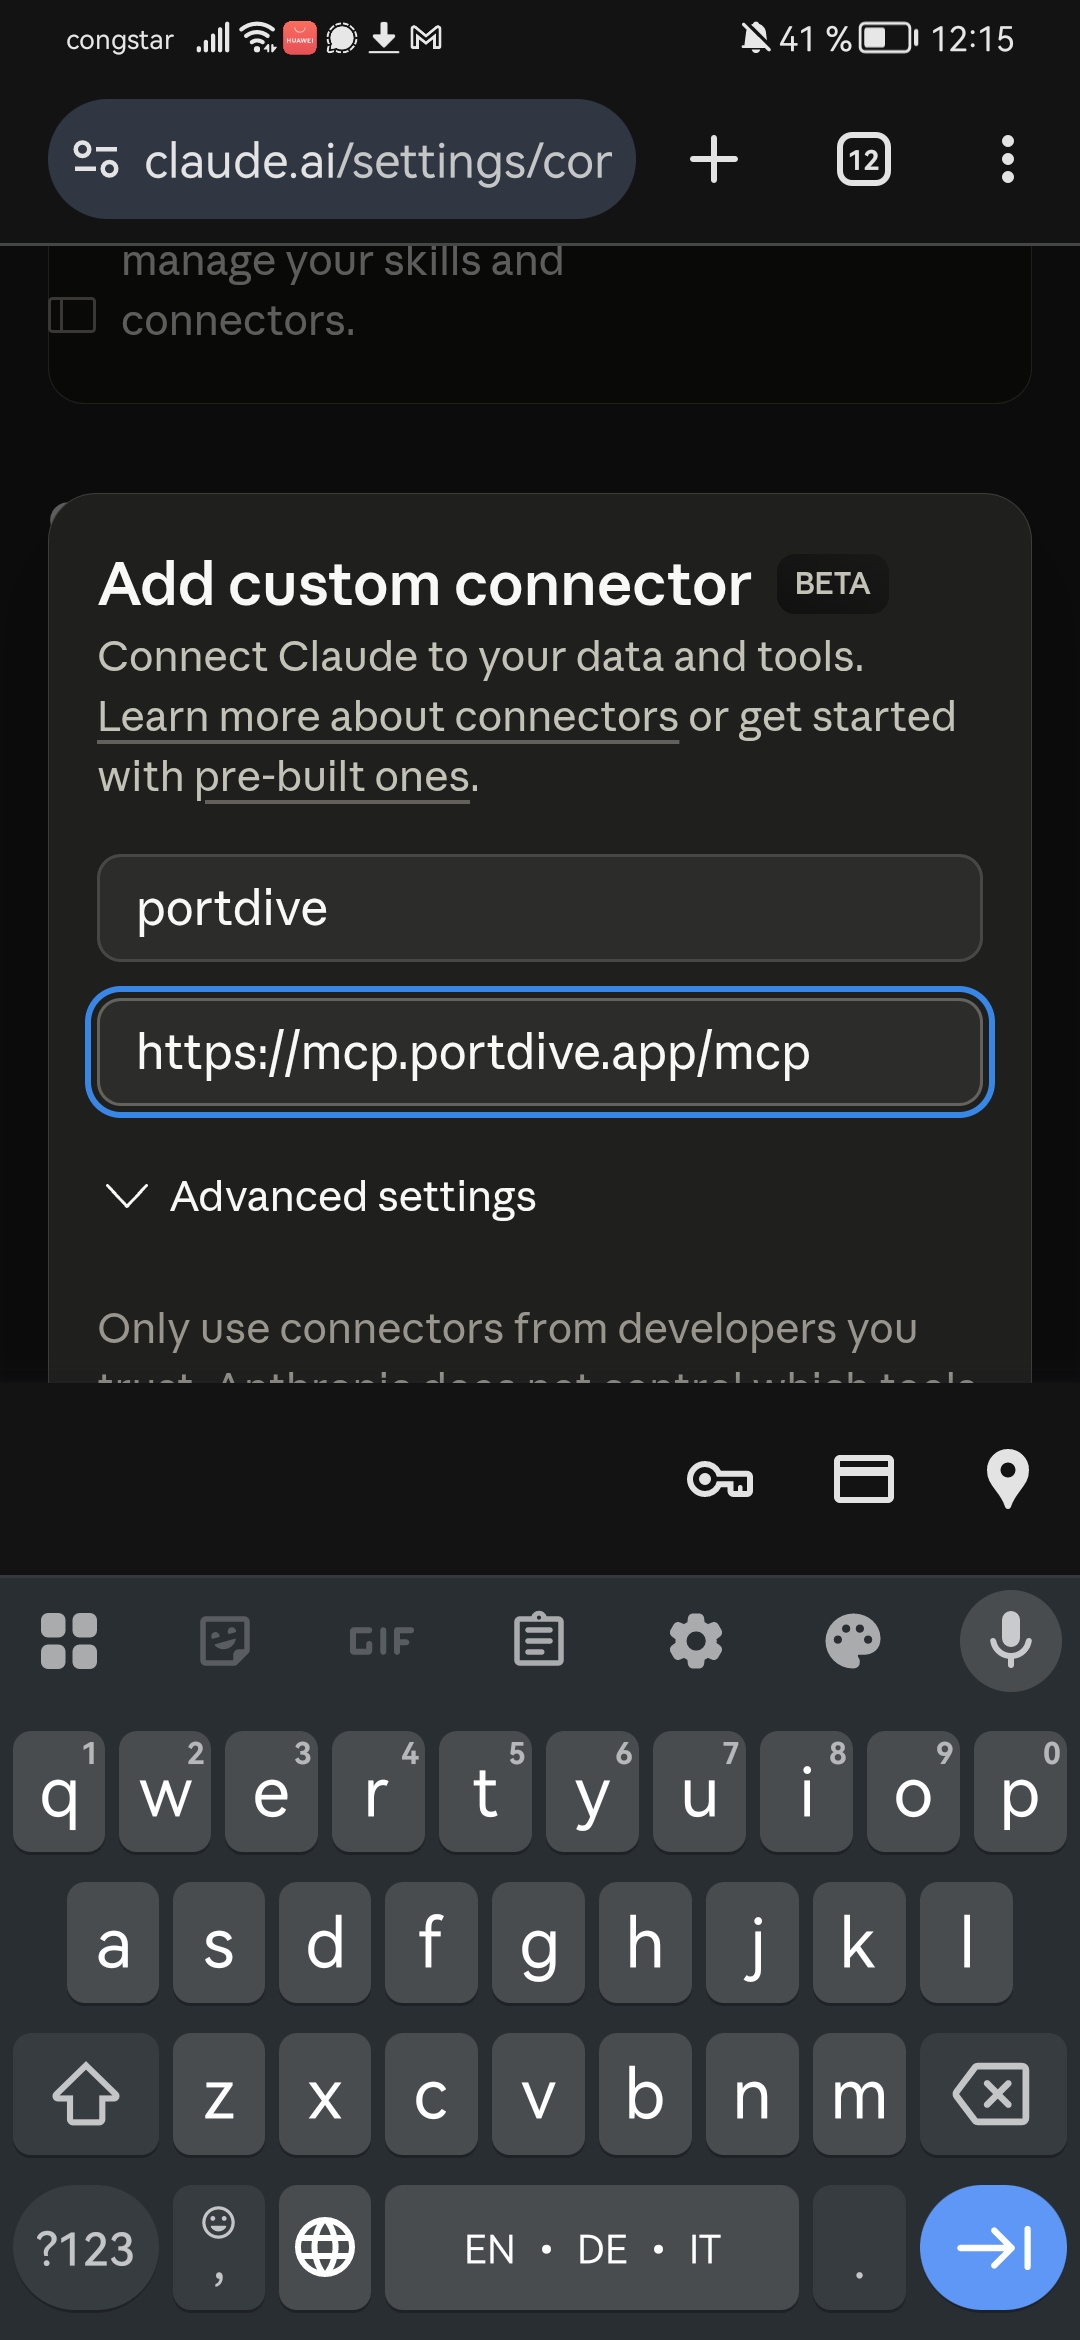
Confirm with Add.
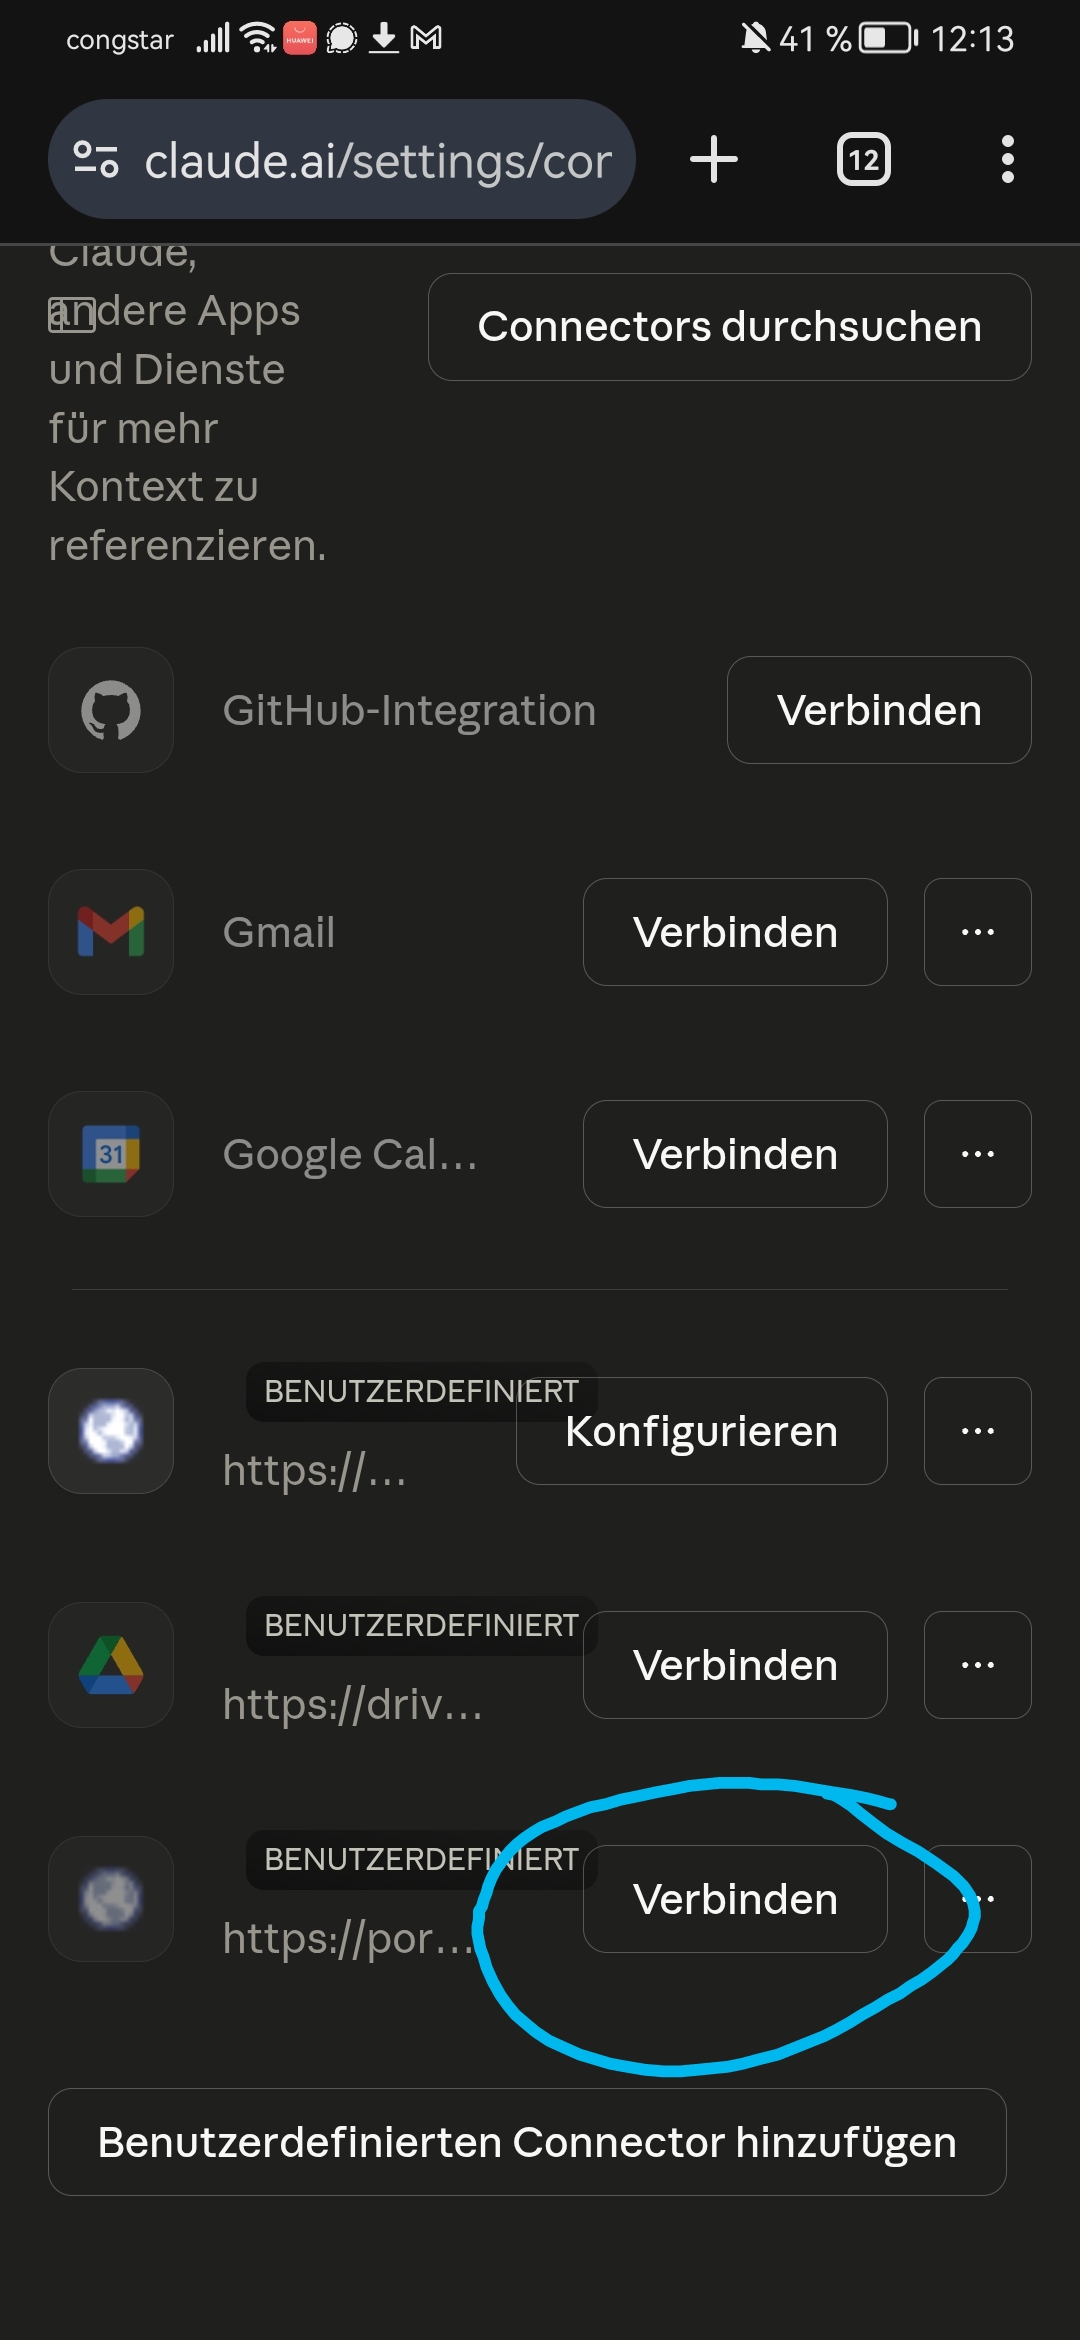
4. Connect the connector
The new portdive connector appears in the list with a Connect button. Tap Connect to start OAuth authentication:
5. Sign in to PortDive
The browser opens the PortDive sign-in page. You can see the permissions the connector will receive and sign in with Google, Apple, or GitHub:
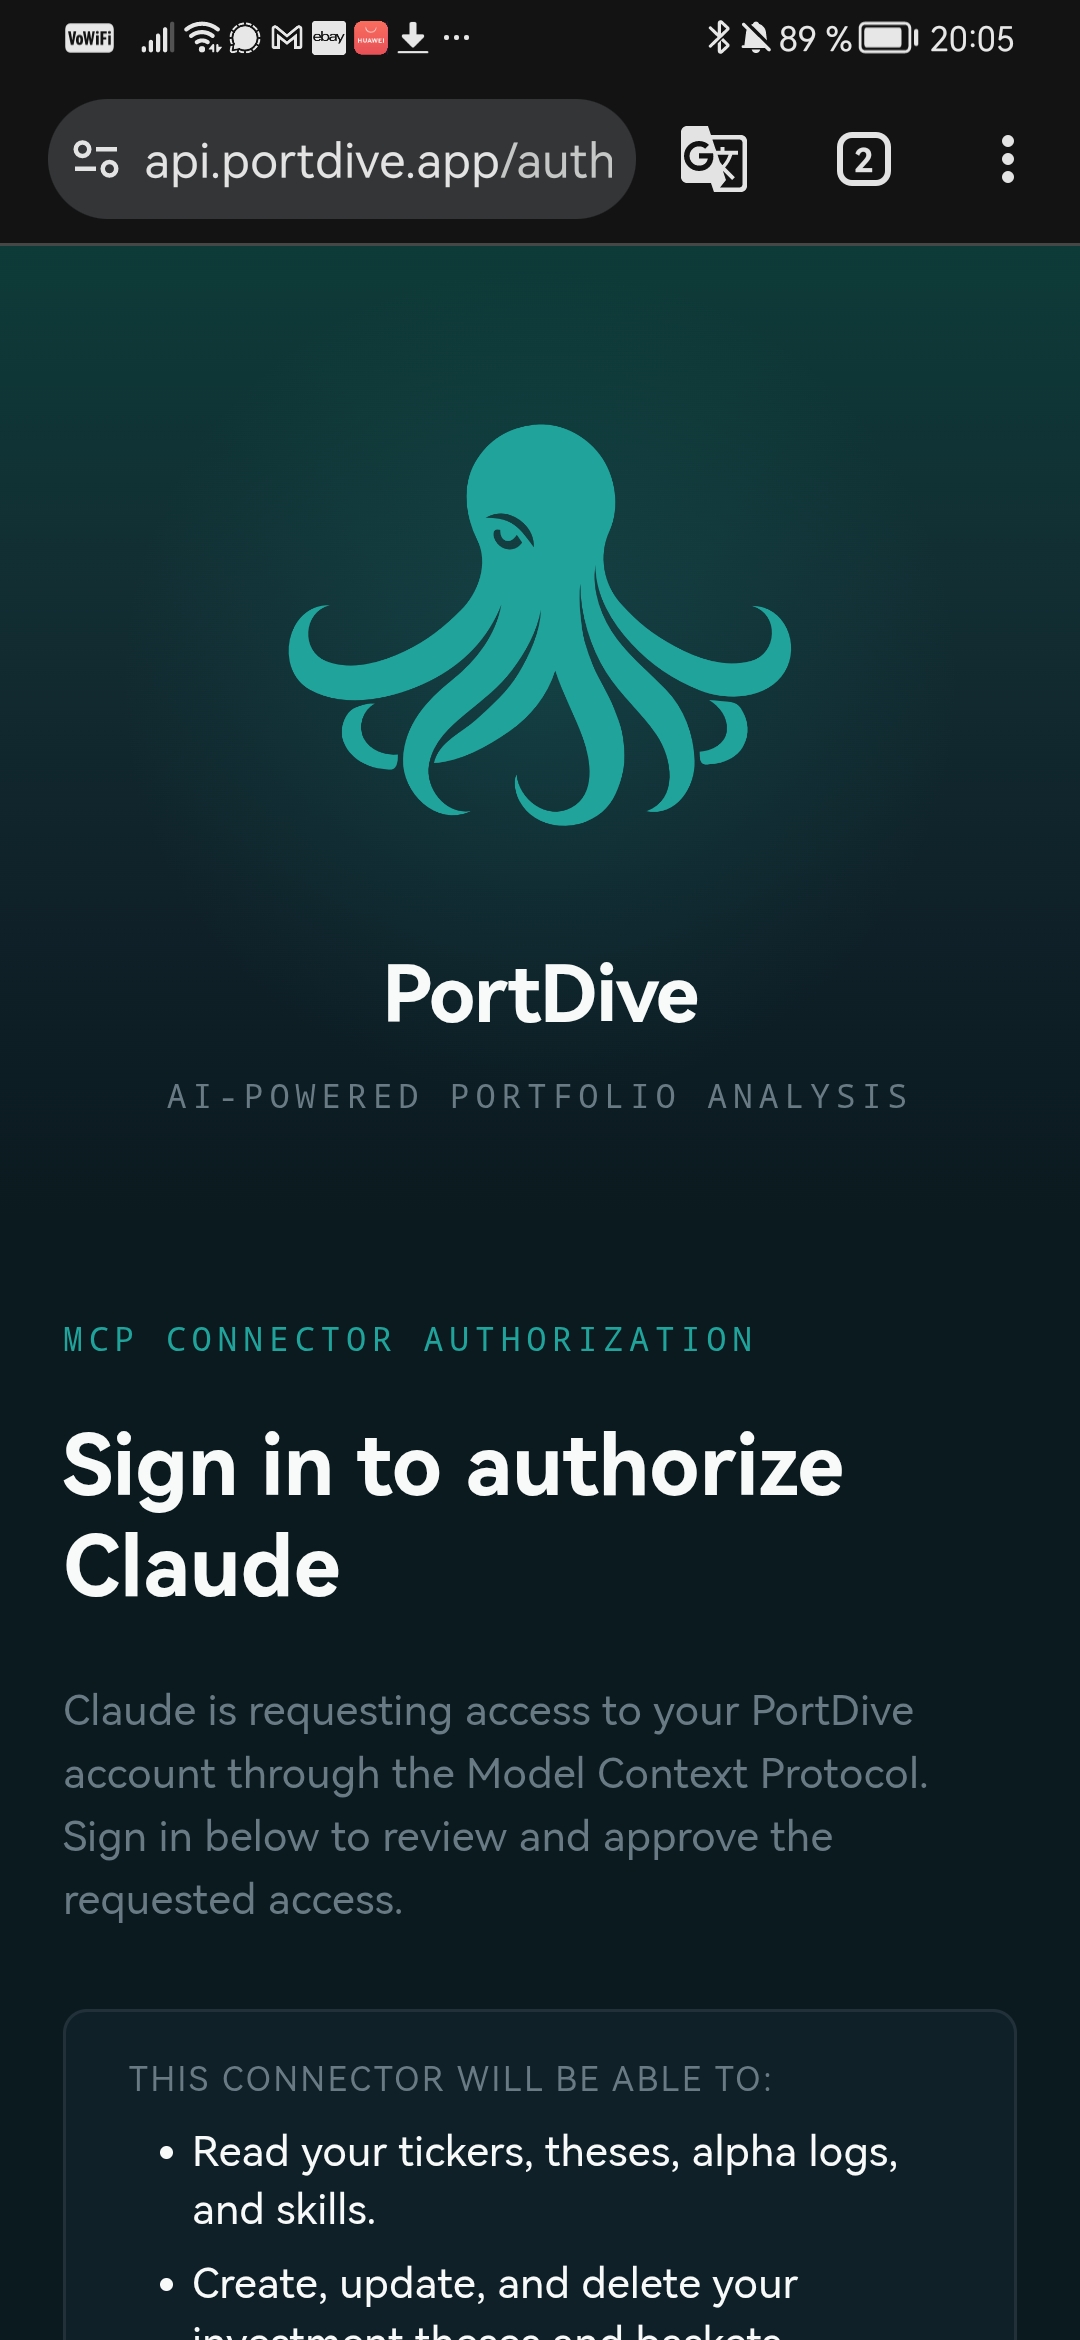
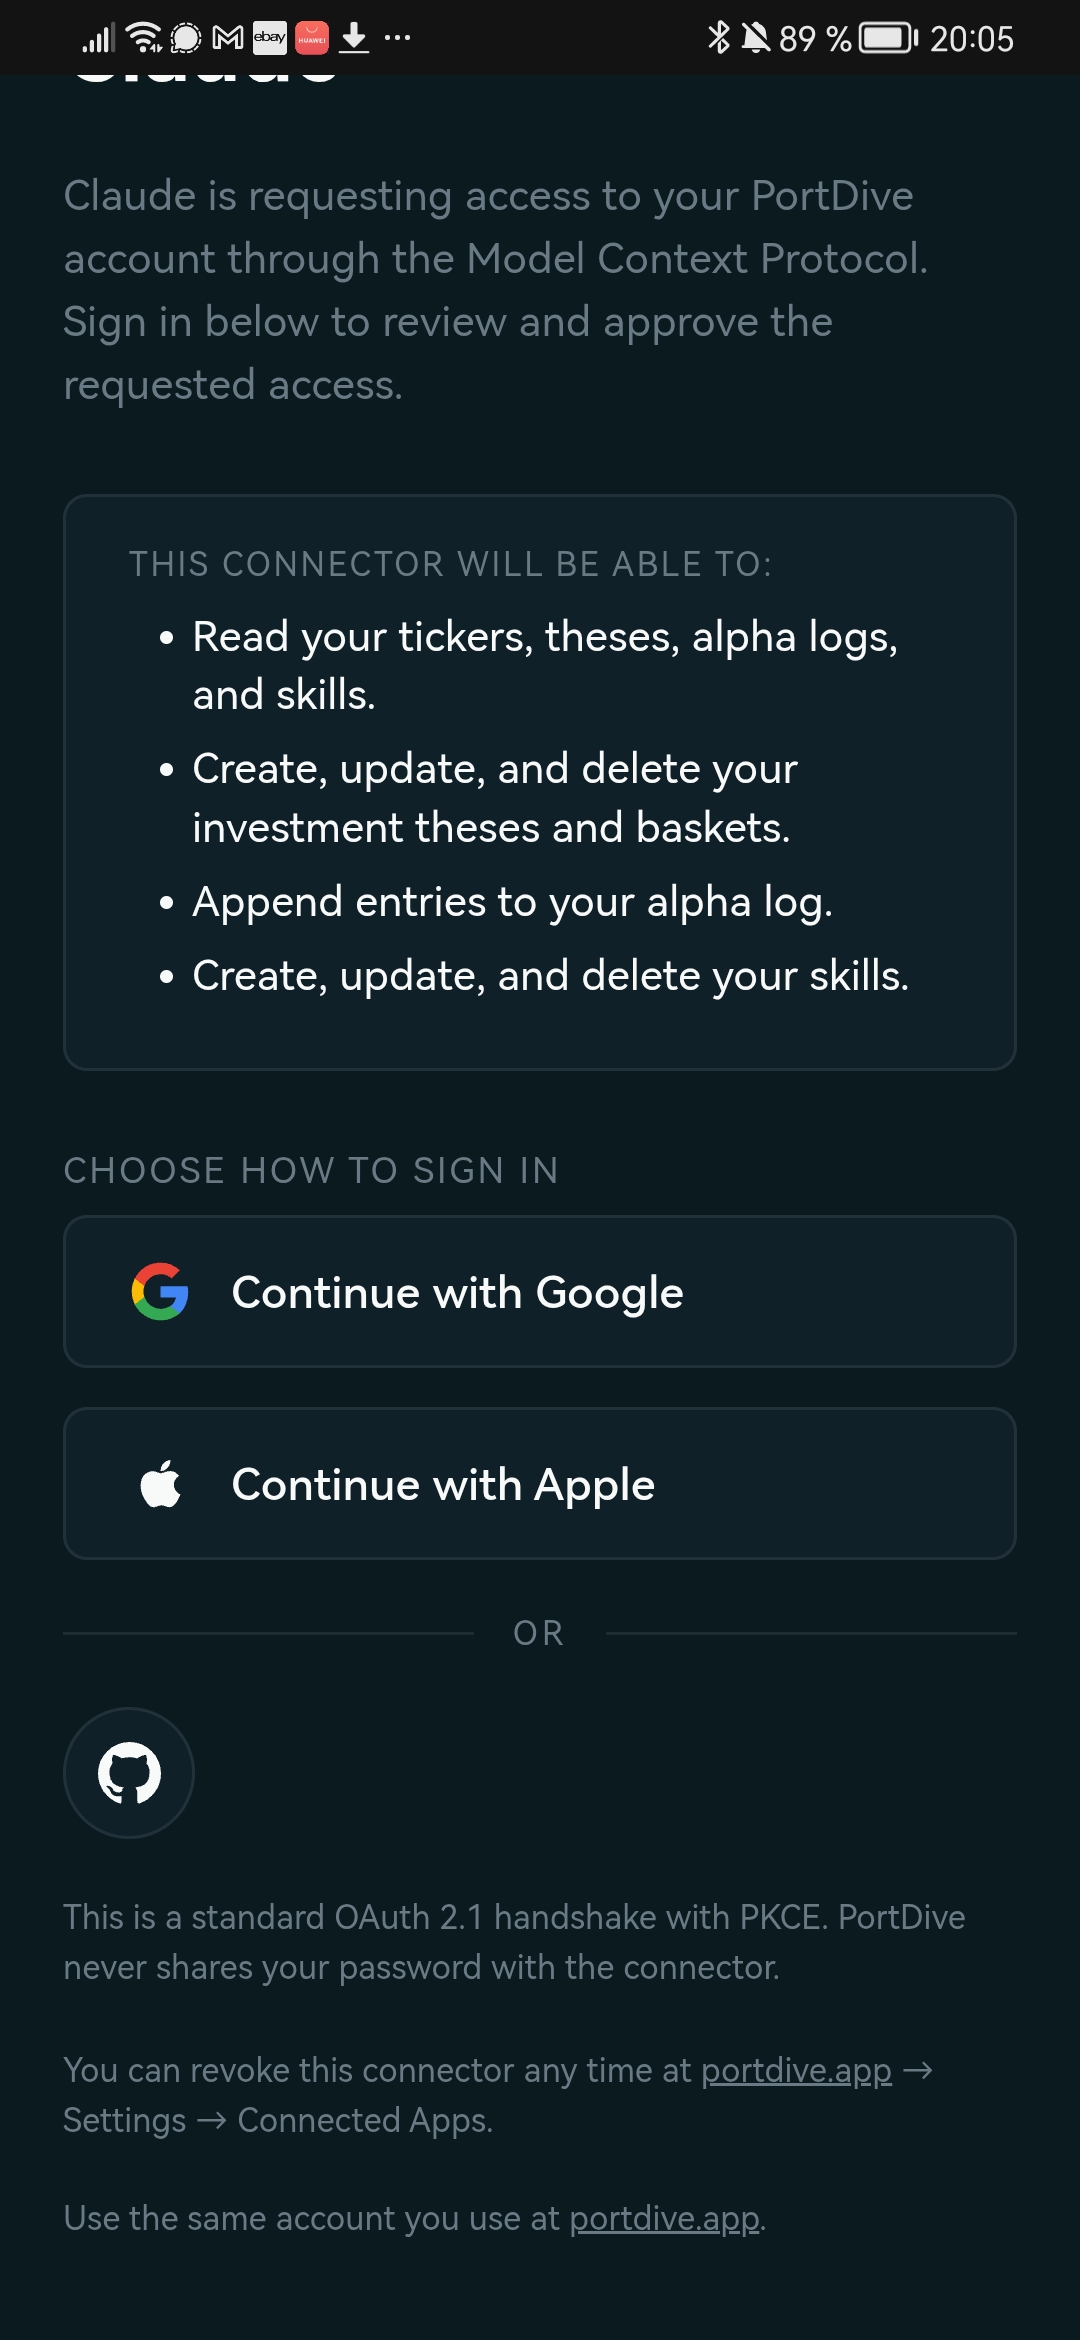
After signing in, you are automatically redirected back to claude.ai. The connector is now active.
Part 2: Use it in the Claude Mobile app
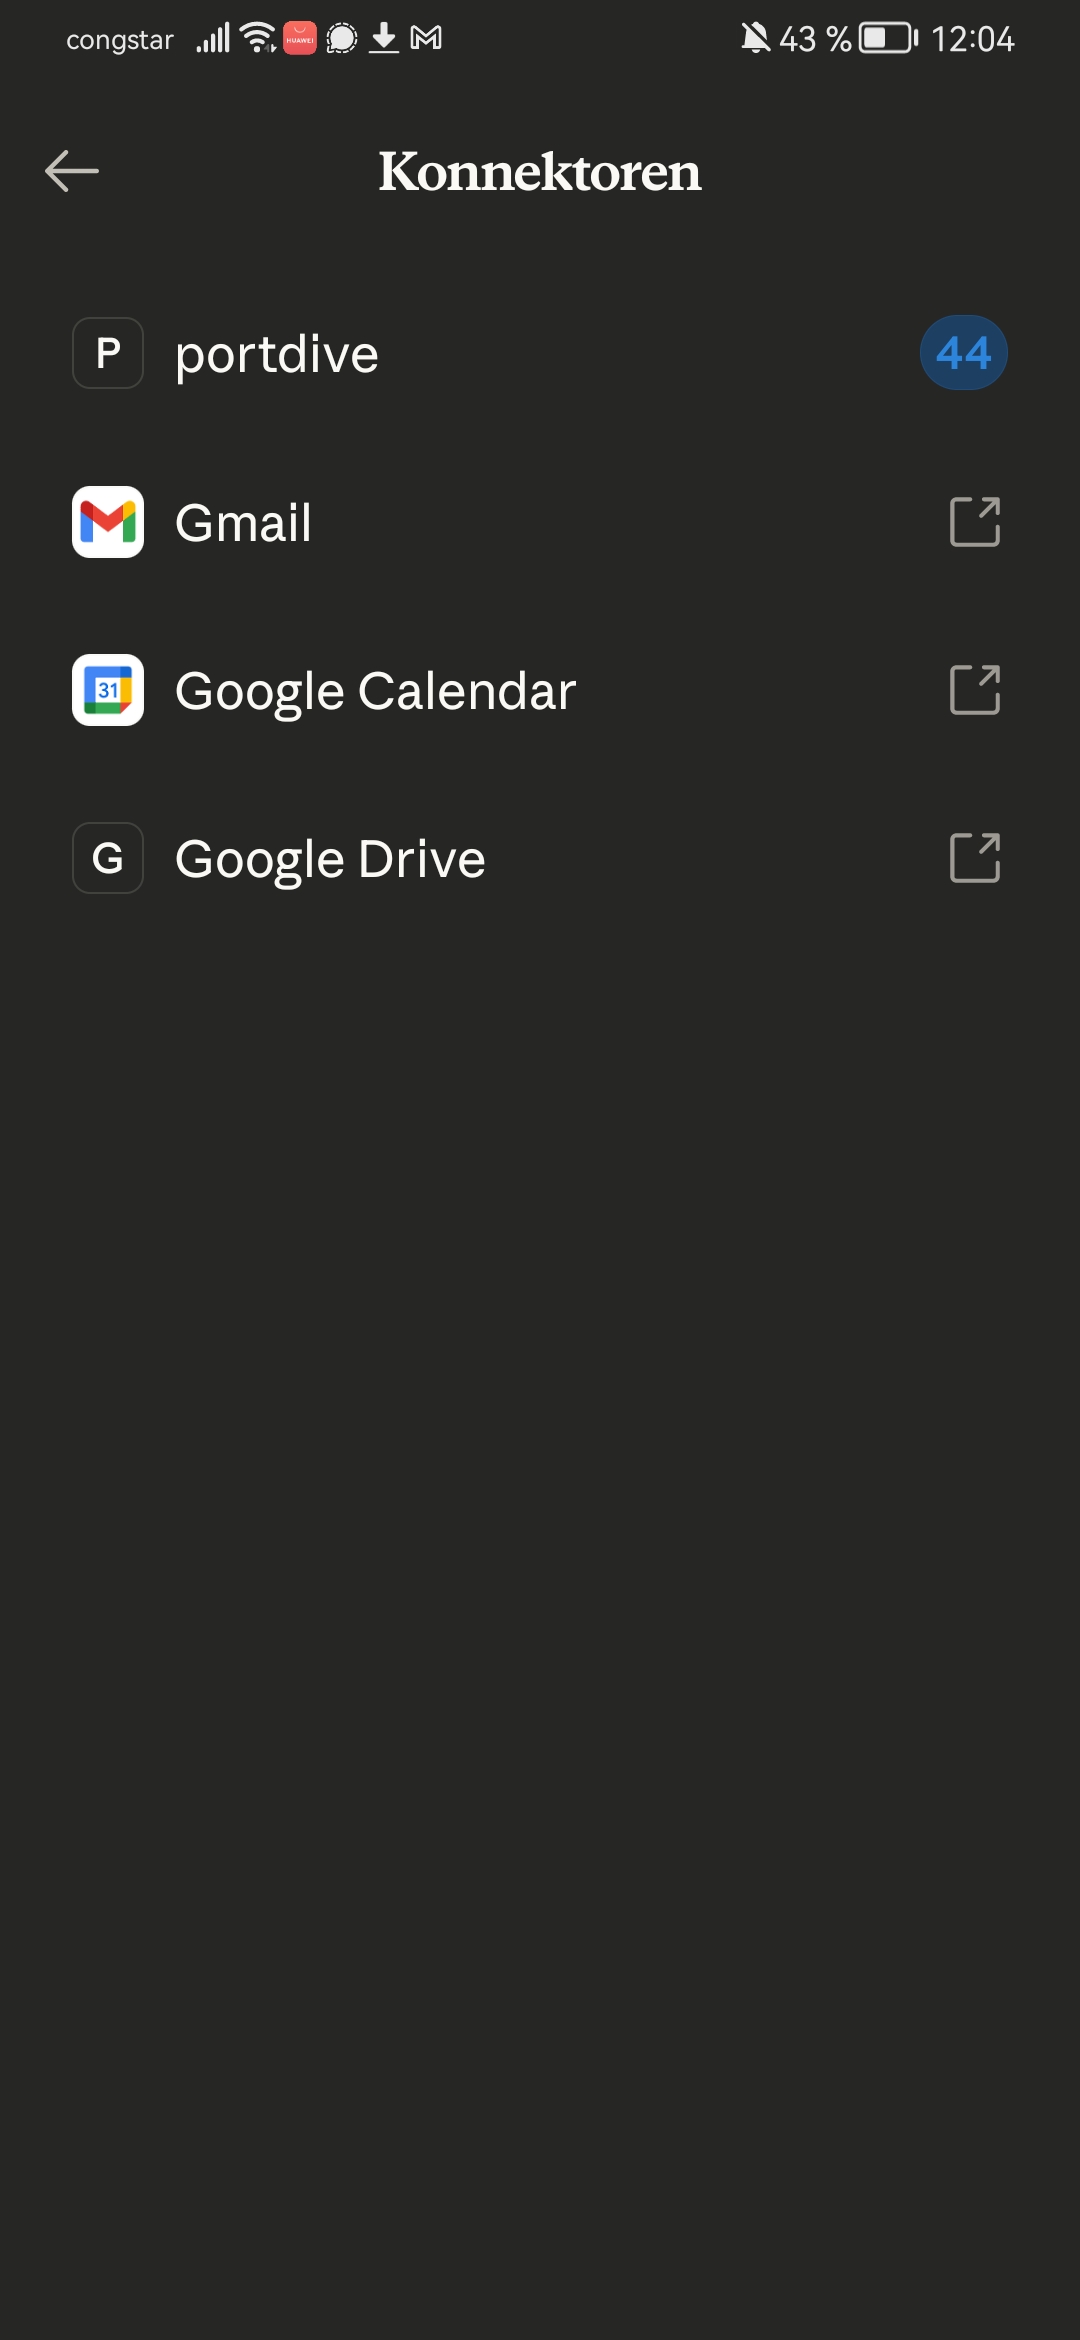
6. Check the connector in the app
Open the Claude Mobile app and navigate to Connectors (via the menu or settings). The portdive connector appears with the number of available tools:
7. Test the connection
Start a new chat and enter a prompt that fetches PortDive data:
Run a health check for the thesis
"AI Hyperscaler and Infrastructure" (ID 18).
Show signals, performance, and data freshness.
Claude will ask for permission before the first tool use. Tap Allow once or Always allow:
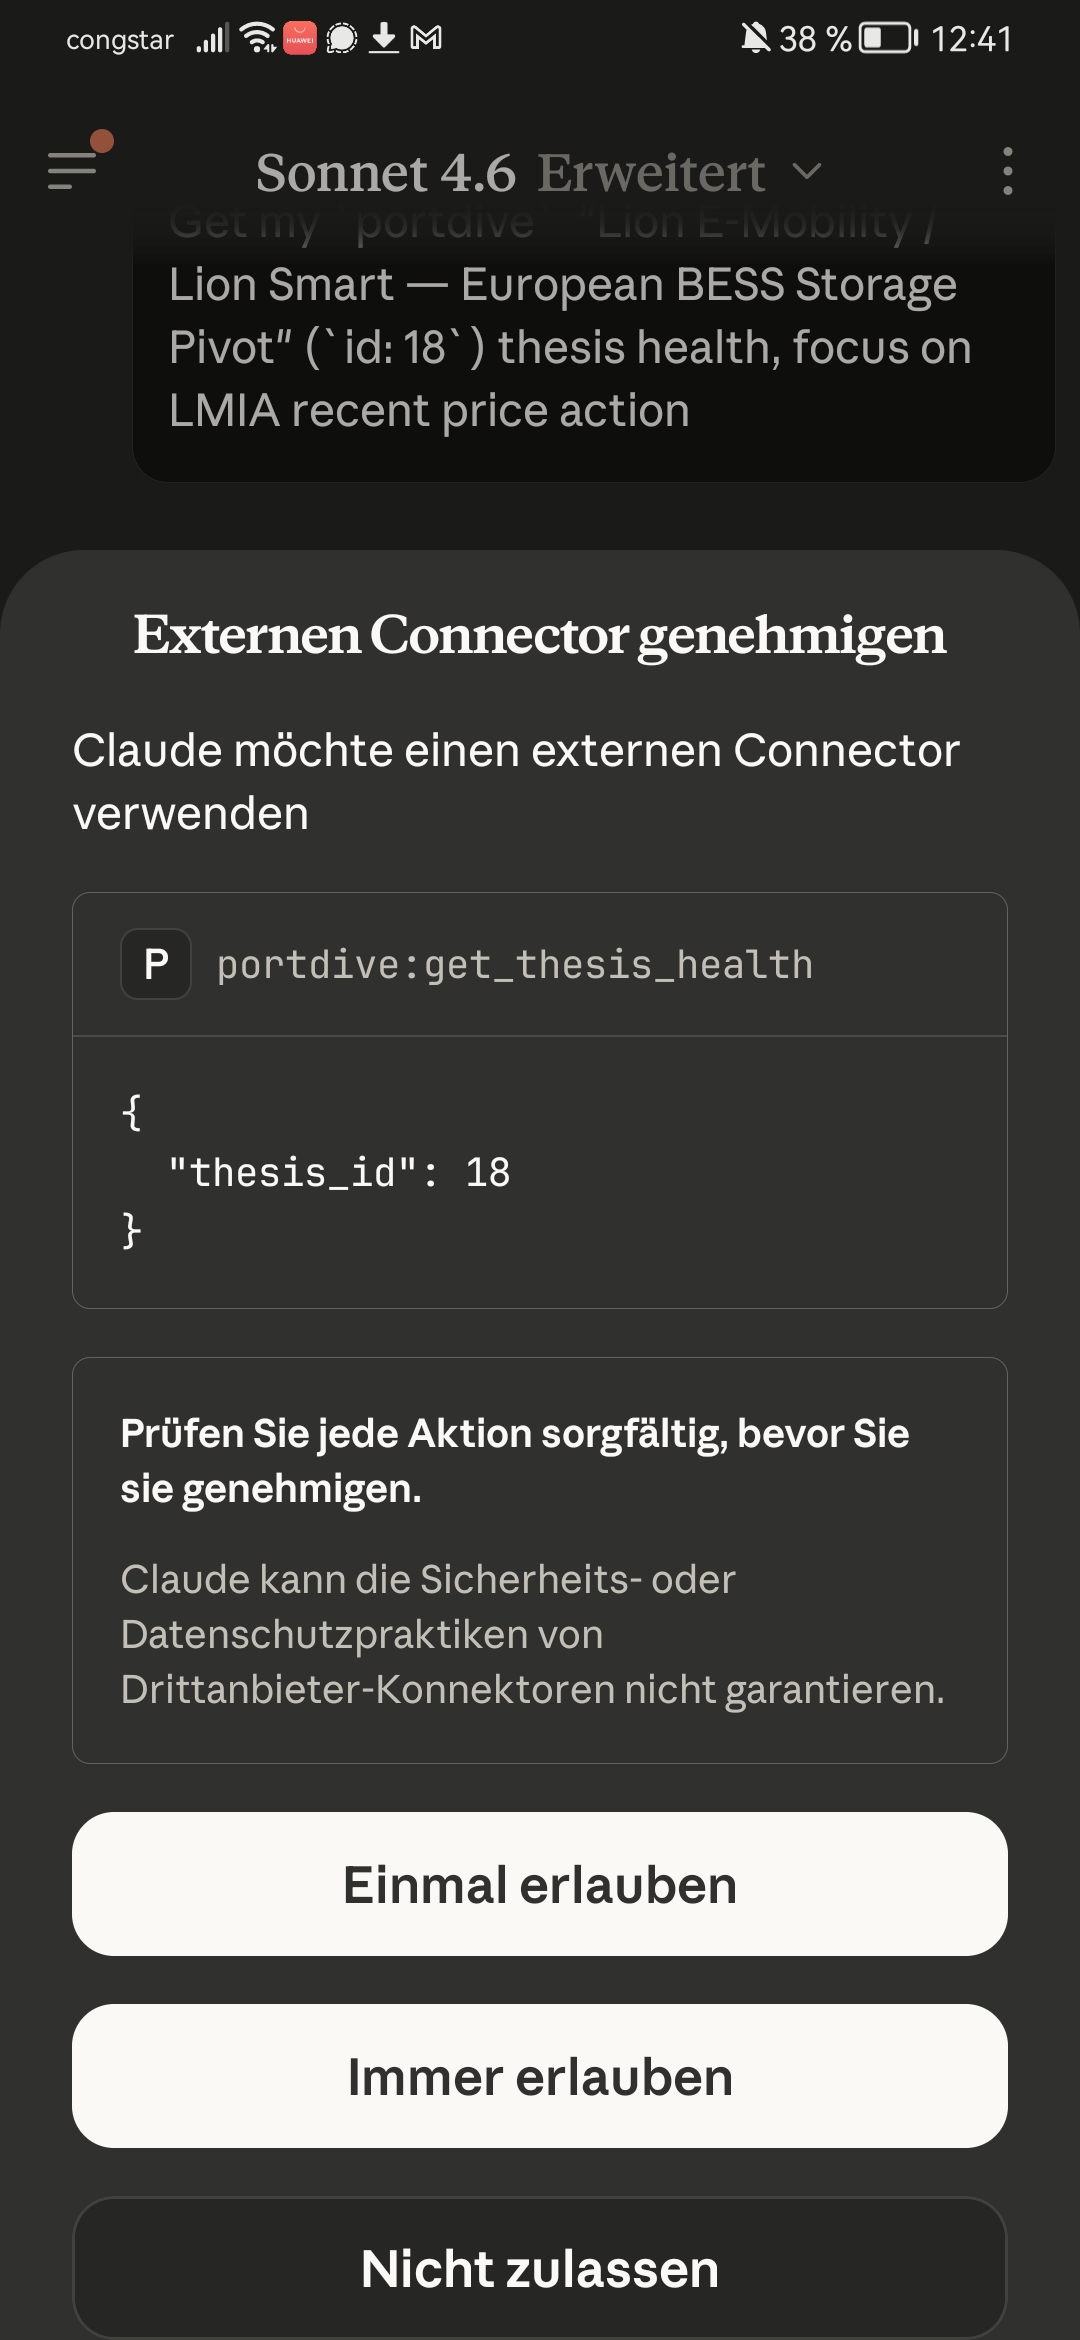
With Always allow, you won't need to confirm each tool call — convenient for frequently used analyses.
Next step: Learn more about using the MCP server in your daily workflow.