Gemini CLI Integration
Gemini CLI is Google's terminal-based AI assistant. It supports remote MCP servers via httpUrl and uses PortDive's OAuth flow directly — no bridge, no token wrangling.
Prerequisites
- Node.js ≥ 20
- A Google account (for the initial Gemini CLI sign-in)
- A PortDive account
1. Install Gemini CLI
npm install -g @google/gemini-cli
The first run (gemini) walks you through the Google sign-in.
2. Configuration
Create or extend ~/.gemini/settings.json:
{
  "mcpServers": {
    "portdive": {
      "httpUrl": "https://mcp.portdive.app/mcp"
    }
  }
}
httpUrl tells Gemini CLI to use the Streamable HTTP transport — the native MCP transport that the PortDive server speaks.
3. First sign-in
Start Gemini CLI in any folder:
gemini
In the prompt, type:
/mcp
You'll see portdive — Disconnected (OAuth not authenticated):
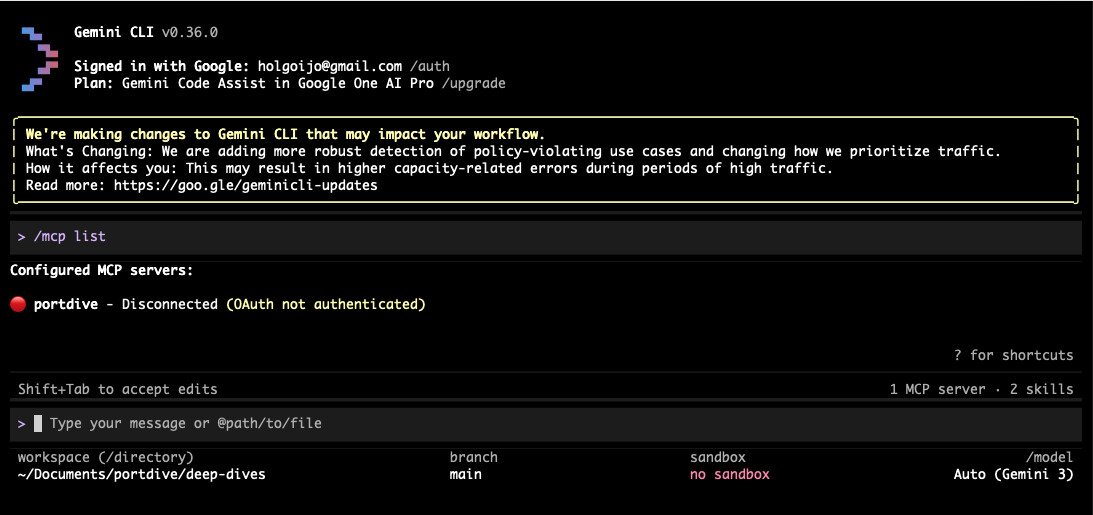
Start the OAuth flow:
/mcp auth portdive
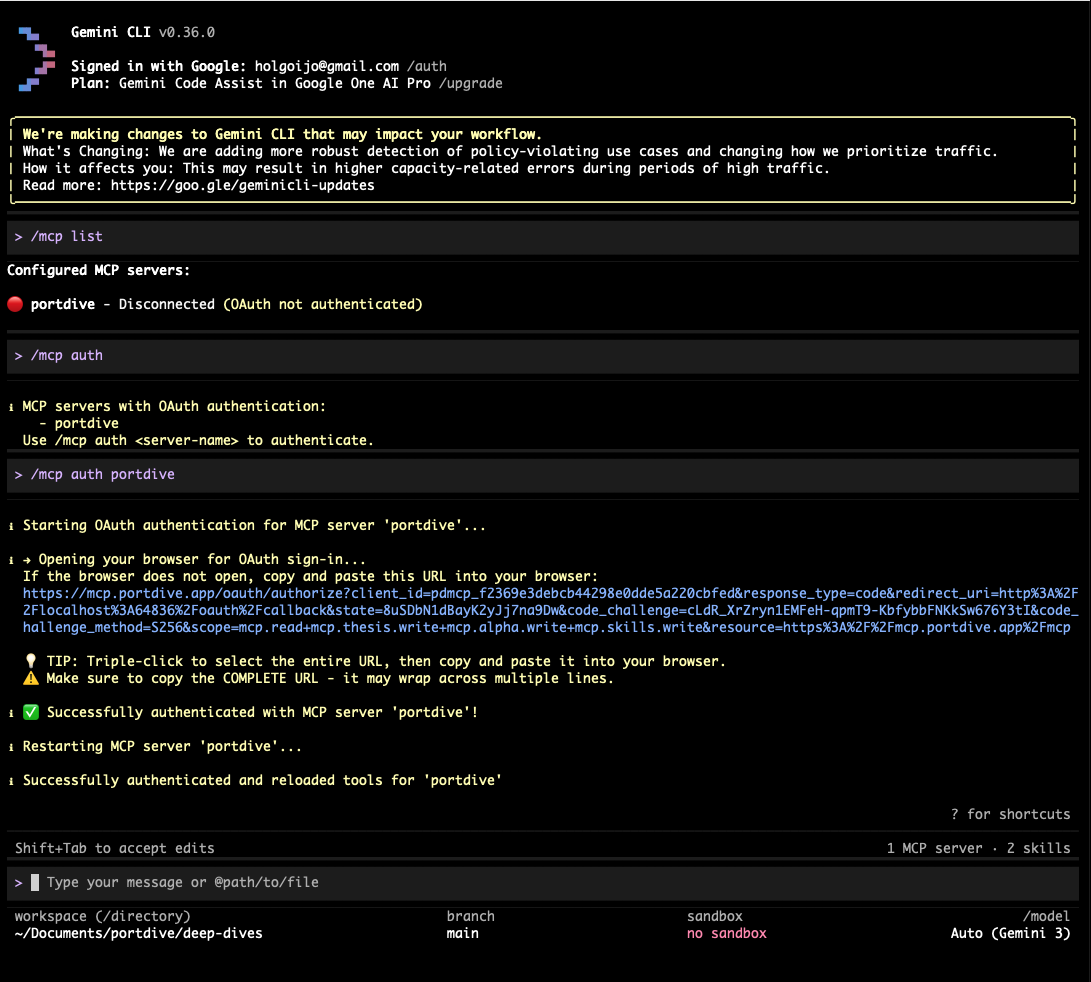
Gemini CLI confirms in the terminal that authentication is starting and prints the URL in case your browser doesn't open automatically:
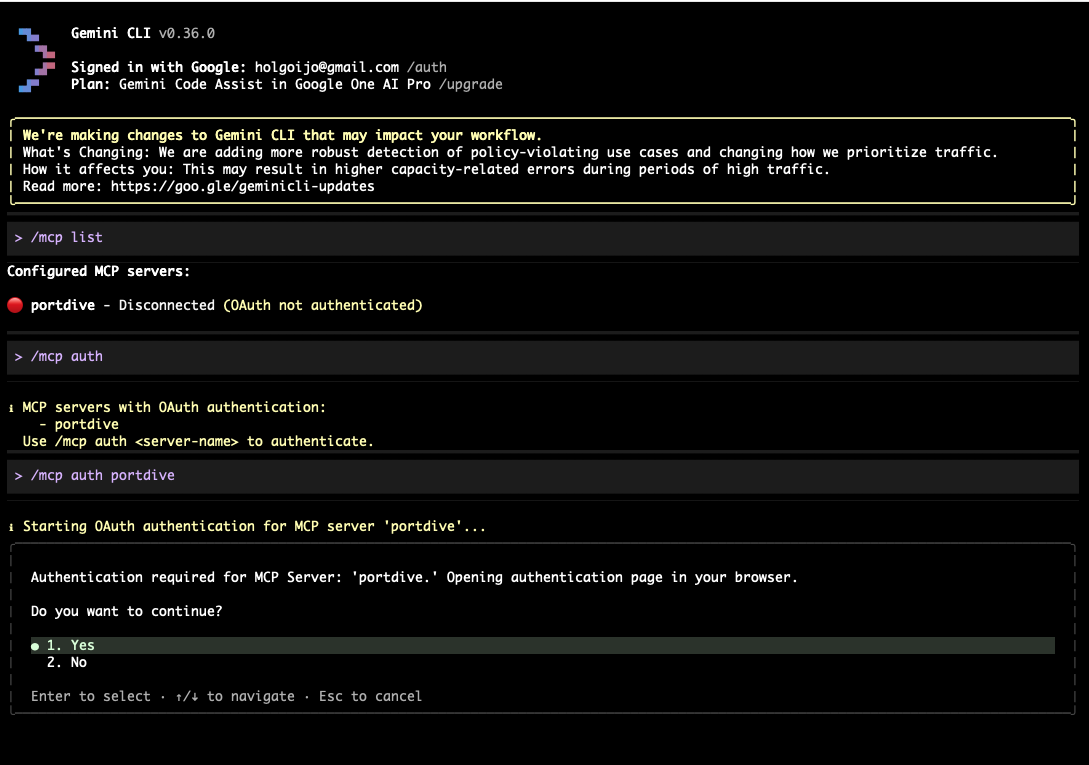
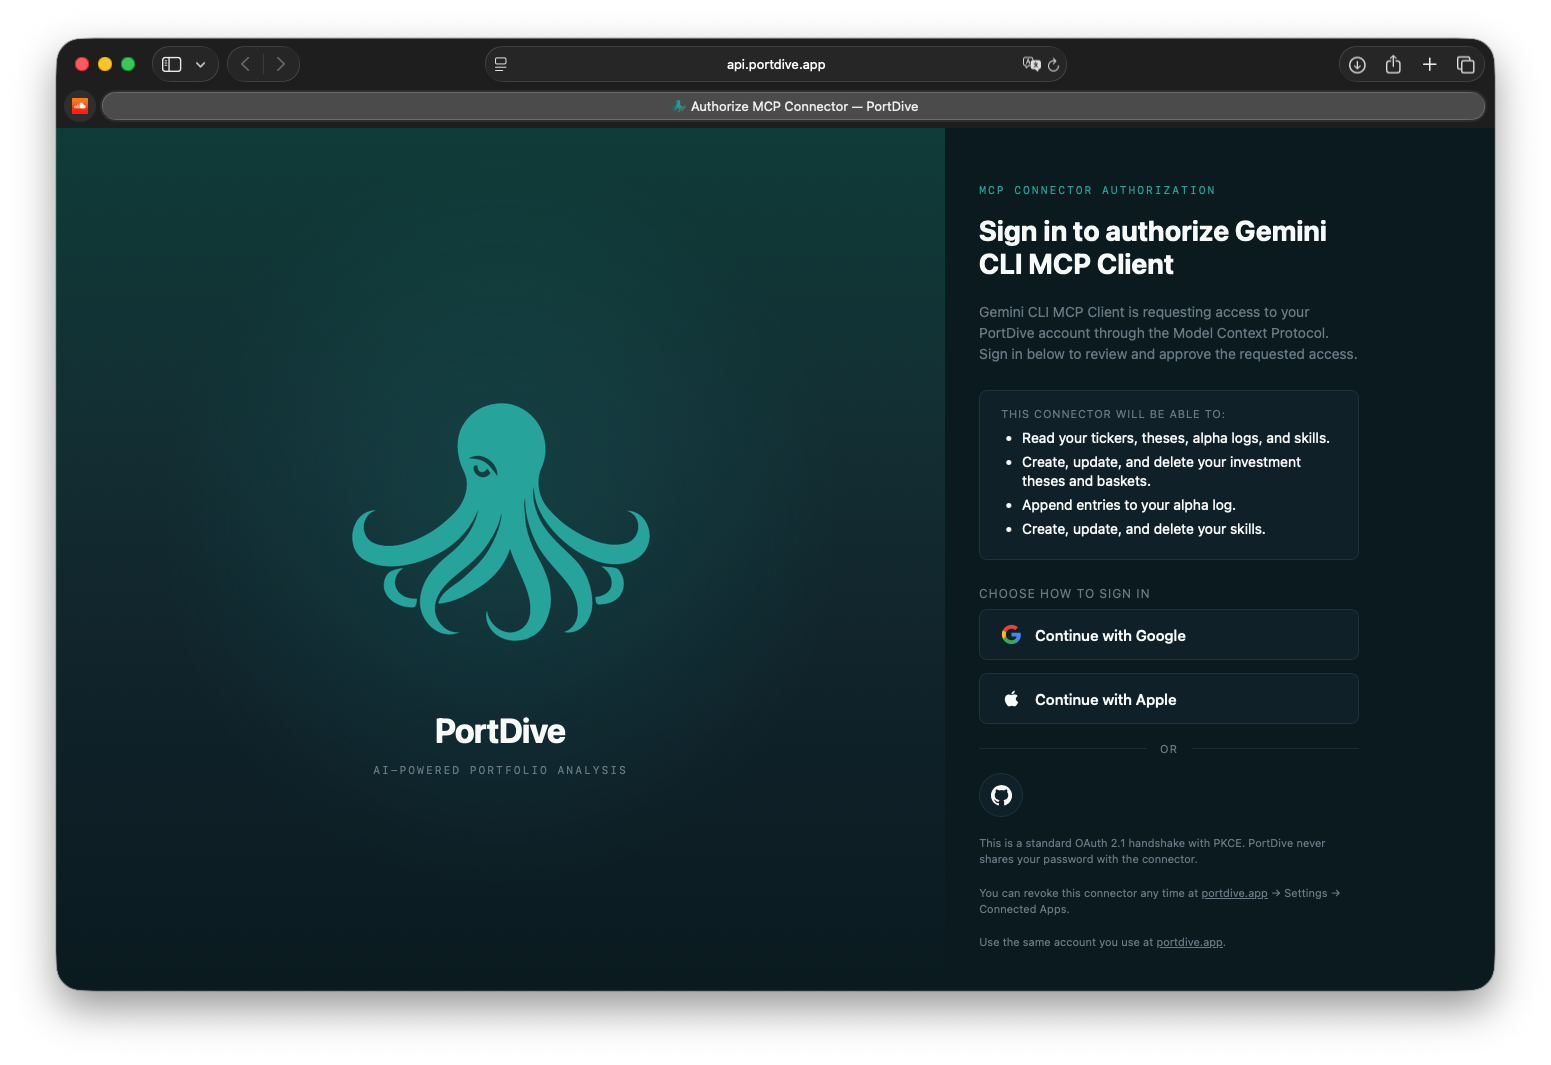
Your browser opens on the PortDive sign-in page — this time with the heading "Sign in to authorize Gemini CLI MCP Client". Pick your preferred login:
After signing in successfully you'll see in the terminal:
✅ Successfully authenticated with MCP server 'portdive'!
Restarting MCP server 'portdive'...
Successfully authenticated and reloaded tools for 'portdive'
4. Usage
/mcp now shows portdive — Connected with all available PortDive tools.
Example prompt:
Use the PortDive MCP and list my investment theses.
5. Troubleshooting
- 401 / token expired → run
/mcp auth portdiveagain. - "Connected, 0 tools" → almost always a transport problem in another client. Gemini CLI's
httpUrluses the native Streamable HTTP transport and should never hit this state.
Next step: Learn more about using the MCP server in your daily workflow.